Adding a Header Image
Adding an image to the top of every page is a two-step process. First you have to upload the image to the Media Library, then set it as the header image via the Customizer. In GeneratePress, it’s called the Logo.
You don’t want it to be too large or it will be overpowering, as well as taking up valuable screen space. The image I have used is 400 x 95 pixels and is a .png image, so the background can be transparent. I would recommend a maximum height of 100 pixels.
In the zip file for the theme you downloaded, there are two files, “Customizer.txt” and “Header Image.txt” that explain the procedure, but seeing it is often better than reading about it.
When displaying images on a website, it’s important to make the file size as small as practicable. Nothing slows a website down more than large image files. And the more images you have on a page, the slower your site will load. If it takes more than 3 seconds to load your site, people will leave and most likely never return.
Once you have made your header image, I recommend you go to a site such as Optimizilla and try a few different levels of file reduction to see how small you can make the file size before losing quality. Then use that image instead of your original version. I was able to reduce my Logo from 20 KB to 5 KB. Once again, I have used Simple CSS to hide the Top Bar on this page.
Adding the Image
 Once you have your optimized image, upload it to the Media Library and ensure you add a description in the “Alternate Text” box. That is needed for both disabled people using a screen reader and search engines, who will be looking for it.
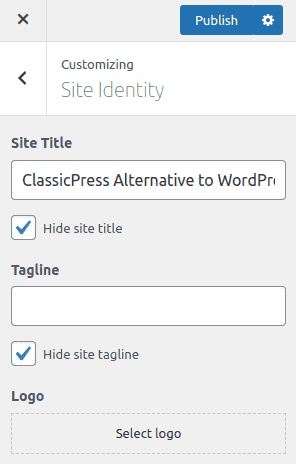
Then go to Appearance>Customize and open the Site Identity tab to get the image shown here. Click on the “Select logo” box and select the image you uploaded.
Click on Select and then “Skip Cropping”. Once your image is showing in the preview, click on Publish and return to your Admin panel. If your image has no clear-space above or below, it will be hard up against the top of the screen and/or the menu bar.
To fix this, go to /wp-content/themes/child/style.css in your site’s file manager and find this block of code at the top of the file:
/* LAYOUT */

.site-header {

height: auto;

background-color: inherit;

}

.inside-header {

padding-top:0;

padding-bottom:0;

}
Change the values for the padding from 0 to 10px or something that gives you suitable, extra empty space. You can also change the colour of the entire header bar by deleting “inherit” and setting your own, such as #FFFFFF for white. A good place to find colours and their Hex Code is this site.
